Step 6: Stitching the Hull
Now it is time for the "stitch" part of "stitch and glue" boat building. I drilled 1/16th inch holes every four inches and 3/8th of an inch in from the edge along both sides of the bottom panels. I stacked the two of them on top of one another and drilled through both so that they would line up exactly. Then I cut 3.5" sections of copper wire and loosely wired the panels together along the keel line as shown above. The ends of the wire are left on what will be the outside of the boat.
Above left: Next I drilled holes in only the bow and stern portions of the side panels and wired them together. I cut and installed a temporary "spreader" which keeps the boat spread to the correct beam (AKA maximum width, which is 23.5" at 104" from bow)
Above right: Then I placed the bottom pieces on top of the side panels and...
Above: ...starting at the stern I made sure that the sides and bottom panels were lined up and then drilled holes in the side panels that exactly lined up with those I had previously drilled in the outside edge of the bottom panels. I worked my way toward the bow, alternating sides, wiring the sides to the bottom loosely as I went. I wired every fourth one with the boat upside down (as pictured) and then flipped the boat over to do the remaining wires because it was far easier with the boat right side up.
I made a guide out of a popsicle stick that allowed me to quickly mark 3/8th of an inch from the edge and this sped things up a little bit but regardless, it was a long slow process: 
Below left: Here it is all stitched up! But it is only loosely stitched, so it is time to tighten it up.
Above right: First step in tightening is to go along with a screw driver and press all of the wires down so they are flush with the inside of the boat.
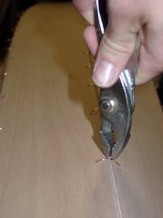
Above: Then I flipped the boat back upside down and tightened the wires with pliers. The trick to keeping the wires from breaking is to make sure that the two ends are twisting around each other rather than just one of them twisting around the other one (don't worry, you will understand what I mean after you break a few).
Above: All done tightening (whew!) and ready for the next step.
total page-views for the whole site since July 17, 2000.


